How to Design on a Rigid Drawer Box Dieline
Follow this step-by-step guide and learn to add your designs to a rigid drawer box dieline template with Adobe Illustrator. This guide walks you through what you should keep in mind as you add your design elements to the dieline template.
Step by Step Guide
1. Getting started
To get started with your rigid drawer box dieline template, begin by making sure your document is in CMYK color mode, the color system used for printing. This can be done by going to File > Document Color Mode > CMYK Mode.
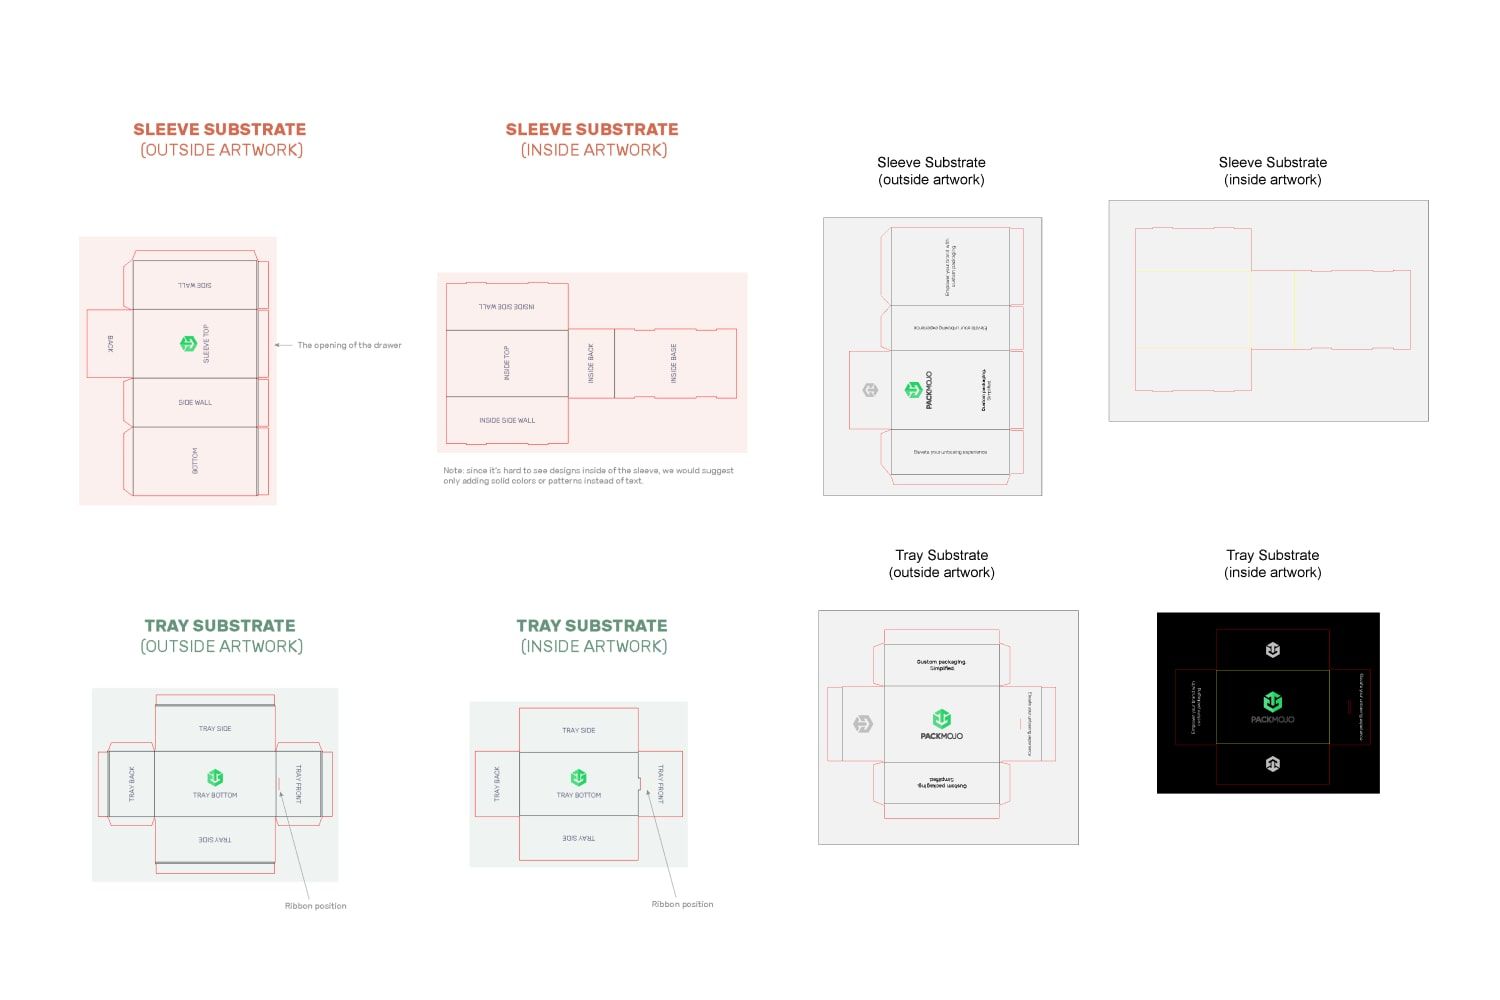
When designing make sure to reference the Rigid Drawer Box Orientation Guide to ensure that you are placing elements in the correct location and orientation. Remember to account for bleeds when adding your designs.
2. Sleeve exterior
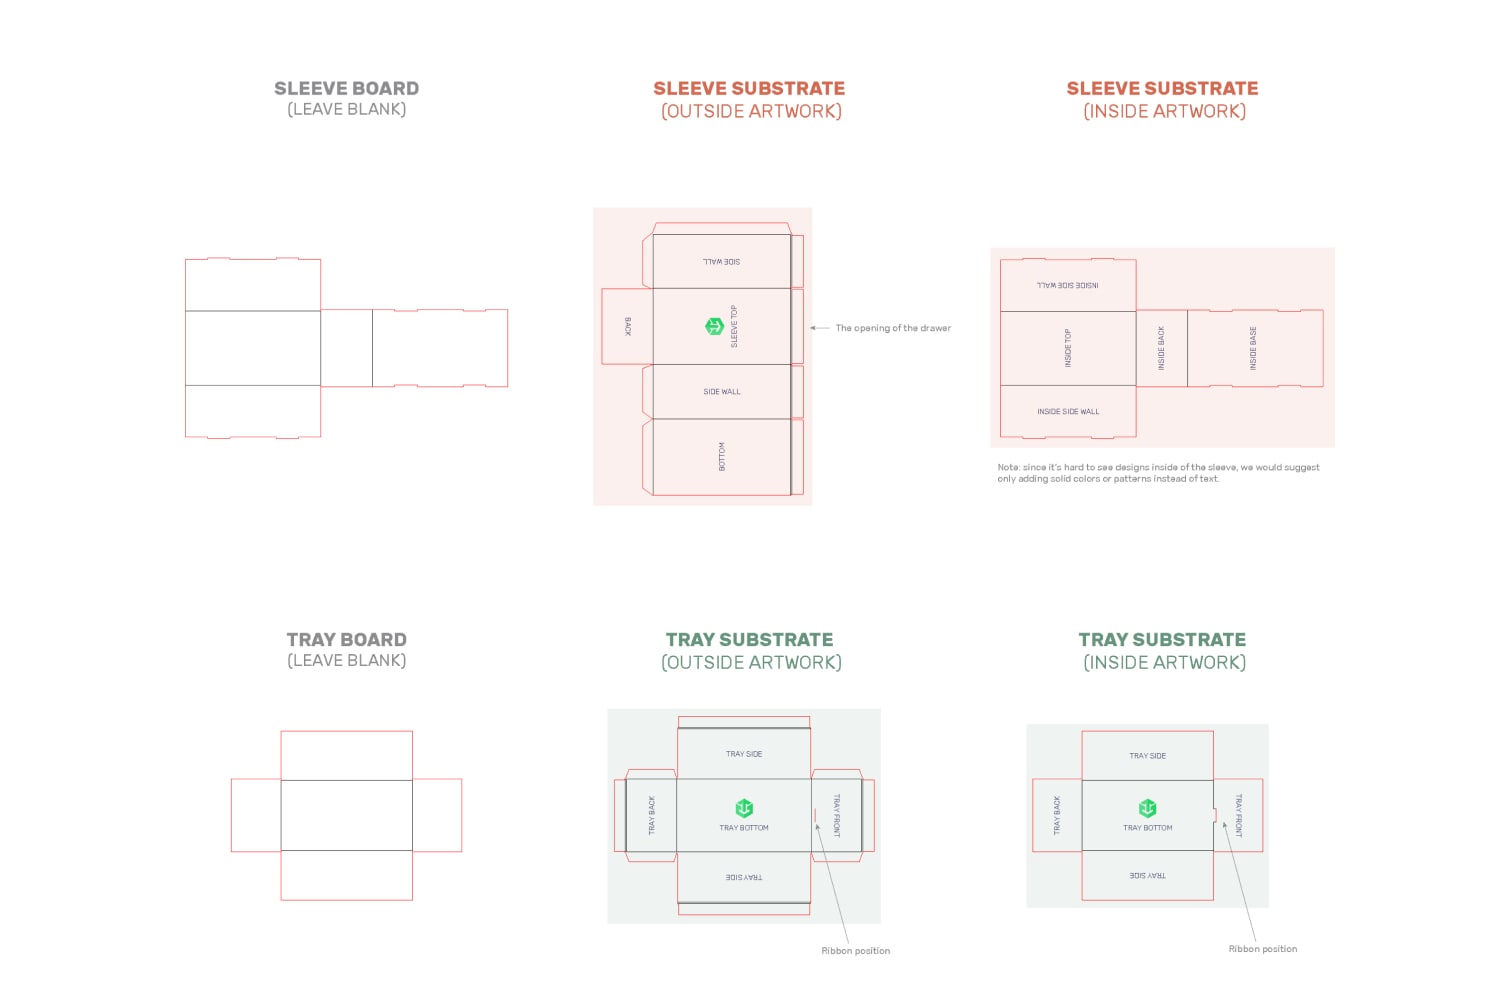
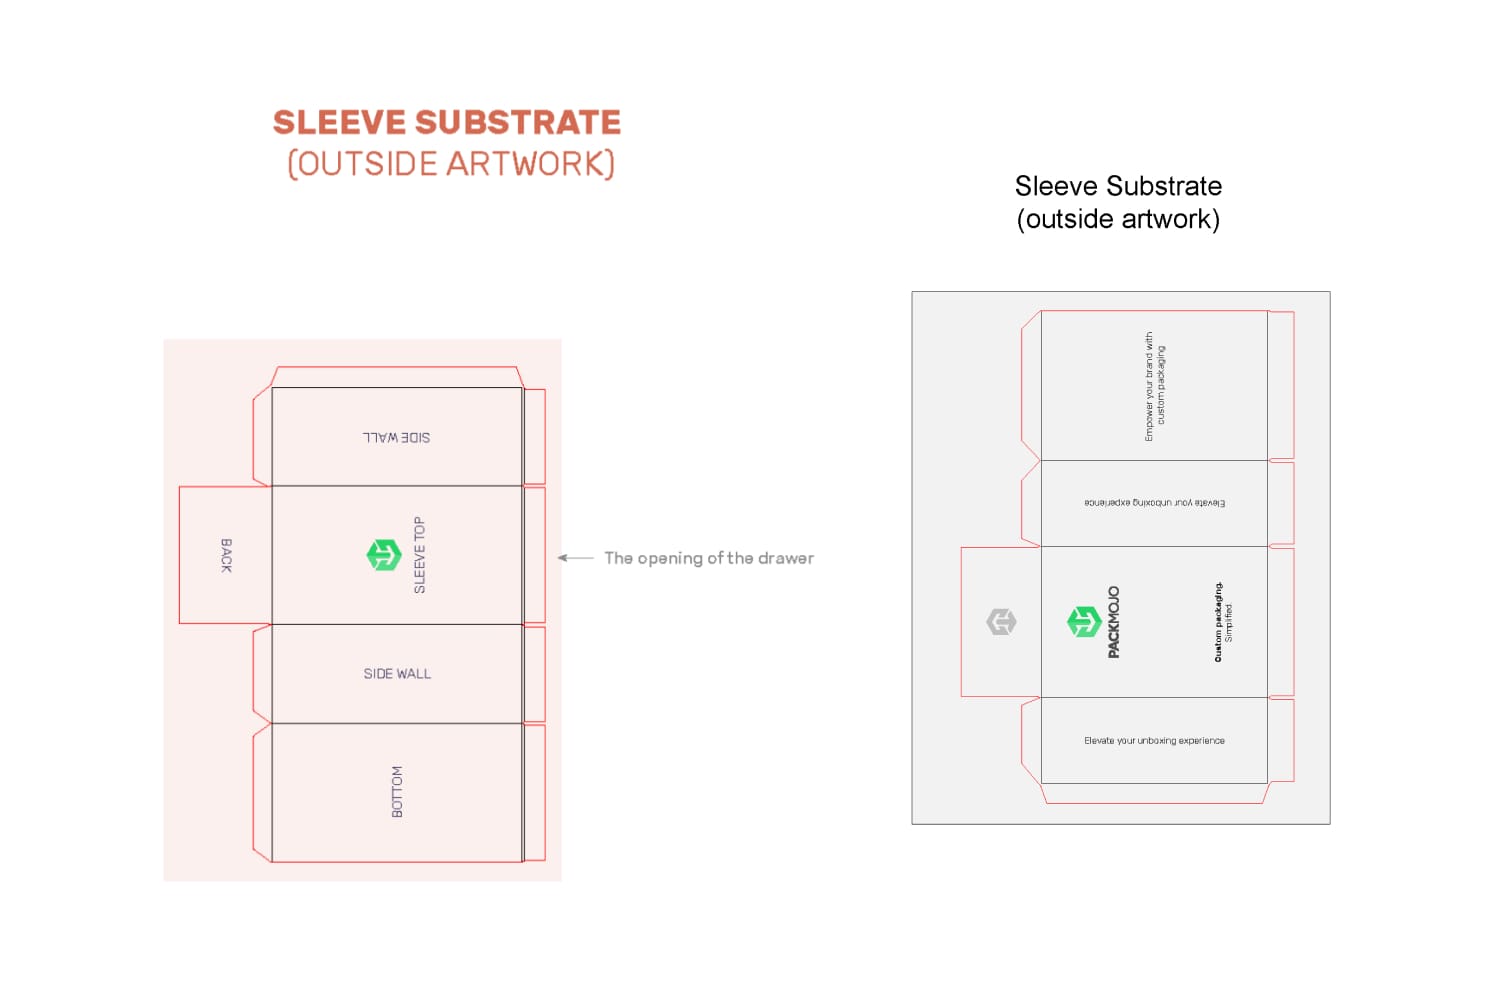
The back of the tray is on the rectangle side that sticks out making the other side where the opening of the drawer sleeve is. When adding your designs to the sleeve exterior, on the back will have to be rotated 90 degrees clockwise, designs on the sleeve top, which is the panel next to the rectangle that sticks out, and designs on the bottom will have to be rotated 90 degrees anti-clockwise.
Designs on the side wall below the front panel, which will be the left side when assembled, can stay in the same orientation whereas designs on the other side wall, which will be the right side when assembled, will need to be inverted.
3. Sleeve interior
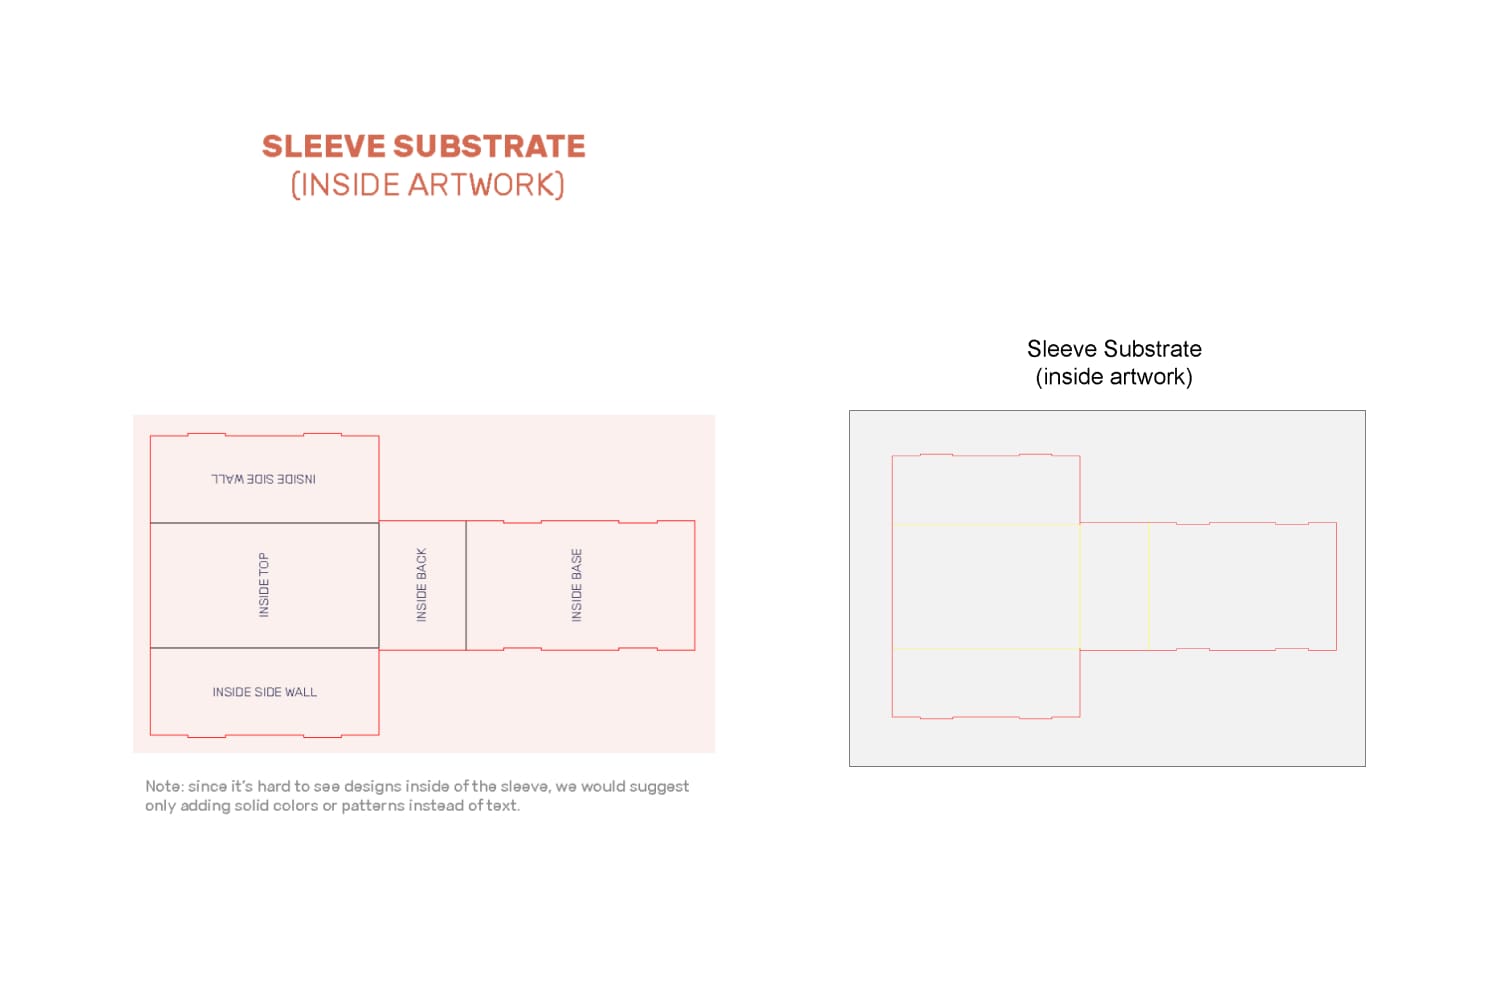
For the interior of the sleeve, designs won't be seen unless one removes the tray. Thus, we recommend that you don’t include any important designs here.
4. Base tray exterior
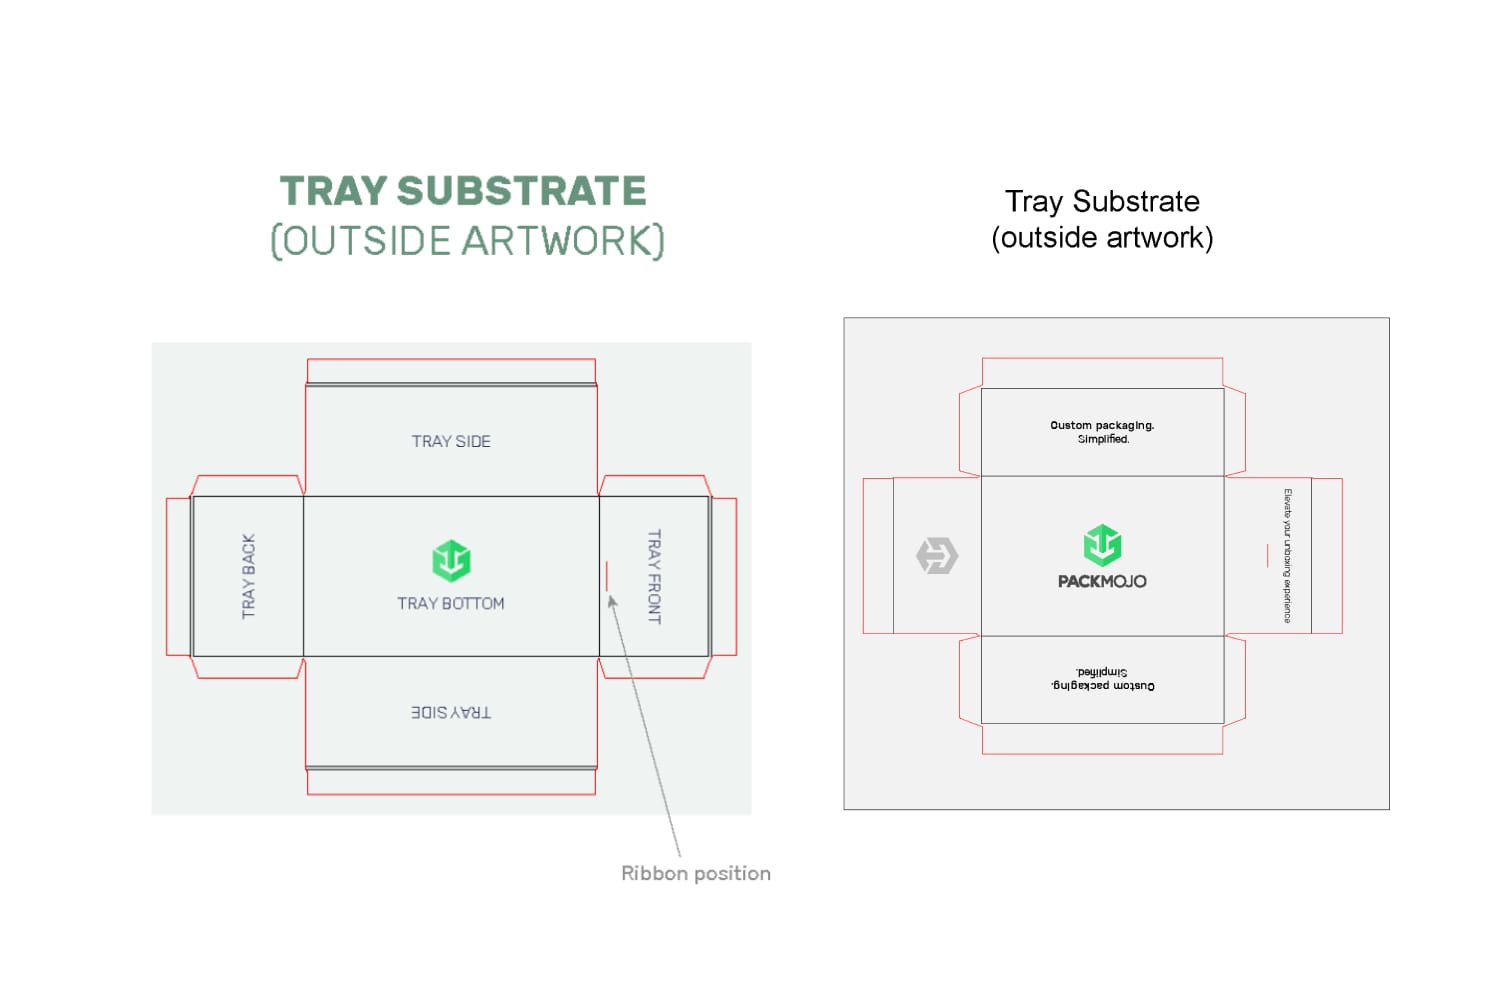
For the exterior front wall of the base tray, your designs should be rotated 90 degrees anticlockwise. For rigid drawer boxes with ribbons, the position of the ribbon is indicated with a line and depends on the size and weight of your box and its intended contents. For heavier boxes or products, the ribbon will have to be closer to the bottom of the box to maintain the integrity of the box. For rigid drawer boxes with thumb notches, the thumb notch will be indicated by a small semi-circle. Make sure no important artwork is over the semi-circle as it will be cut out.
Designs on the back the base tray should be rotated 90 degrees clockwise. Keep in mind that the back of the base tray won’t be seen unless the tray is completely removed from the sleeve.
For the side walls, designs on the left side exterior of the tray will stay in the same orientation and designs on the right side exterior of the tray will need to be inverted.
For the bottom exterior of the tray, designs can stay in the same orientation if you will be pulling the drawer out of the box sideways. However, if you want designs to be upright while pulling the drawer towards you, you will need to rotate them 90 degrees anticlockwise.
5. Base tray interior
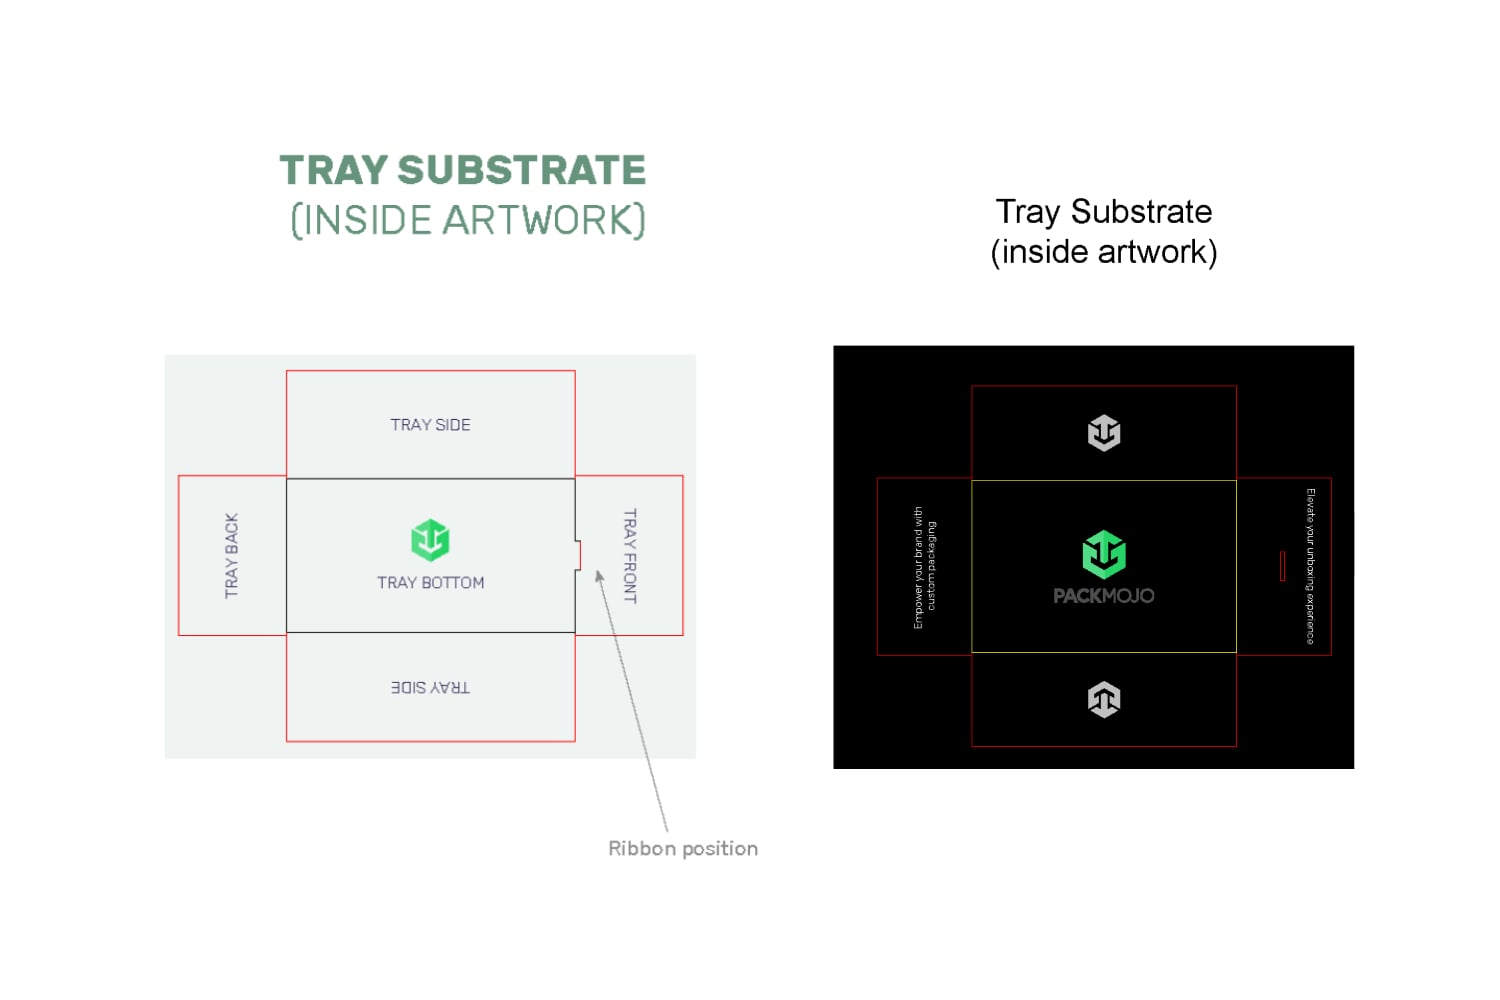
For the interior front wall of the tray, designs should be rotated 90 degrees clockwise. For rigid drawer boxes with ribbons, the ribbon position here will be indicated by a small rectangle. For rigid drawer boxes with thumb notches, the thumb notch will again be indicated by a small semi-circle and should not include any important designs. Designs on the back interior of the tray should be rotated 90 degrees anticlockwise.
Similar to the exterior designs on the right side, the right interior of the tray will stay in the same orientation and designs on the left side interior of the tray will need to be inverted. For the bottom interior of the tray, designs can also stay in the same orientation if you will be pulling the drawer out of the box sideways to the right. However, if you want designs to be upright while pulling the drawer towards you, you will need to rotate them 90 degrees anticlockwise.
6. Finishing up
When you're done designing, double check it with the dieline orientation guide to make sure that everything is in the correct location and orientation.
To learn more about adding logos, vectorizing text or embedding images on dielines in Adobe Illustraor, head to our dieline design tips page.
