How to Design on a Mailer Box Dieline
Follow this step-by-step guide and learn to add your designs to a mailer box dieline template with Adobe Illustrator. This guide covers everything you need to create a production-ready design, including how vectorize text, center logos, embed image files and more.
Step by Step Guide
1. Put your document in CMYK Color Mode
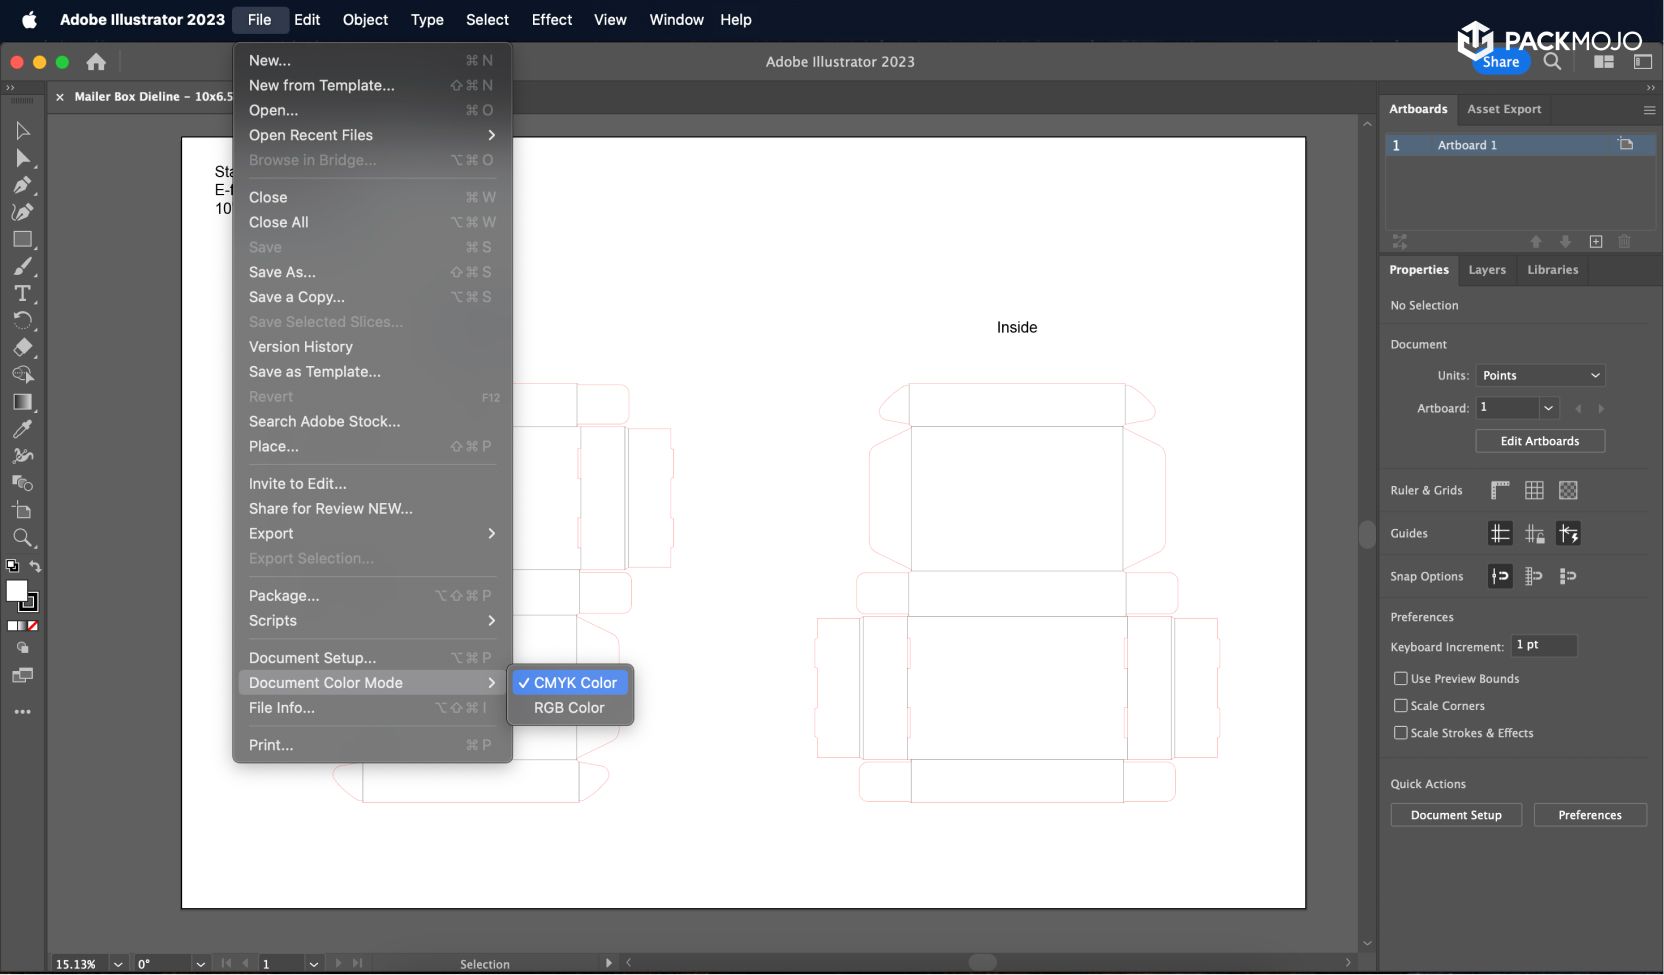
CMYK is the color system used for printed works. To ensure that your document is in CMYK color, go to File > Document Color Mode > Select CMYK Color.
2. Begin designing!
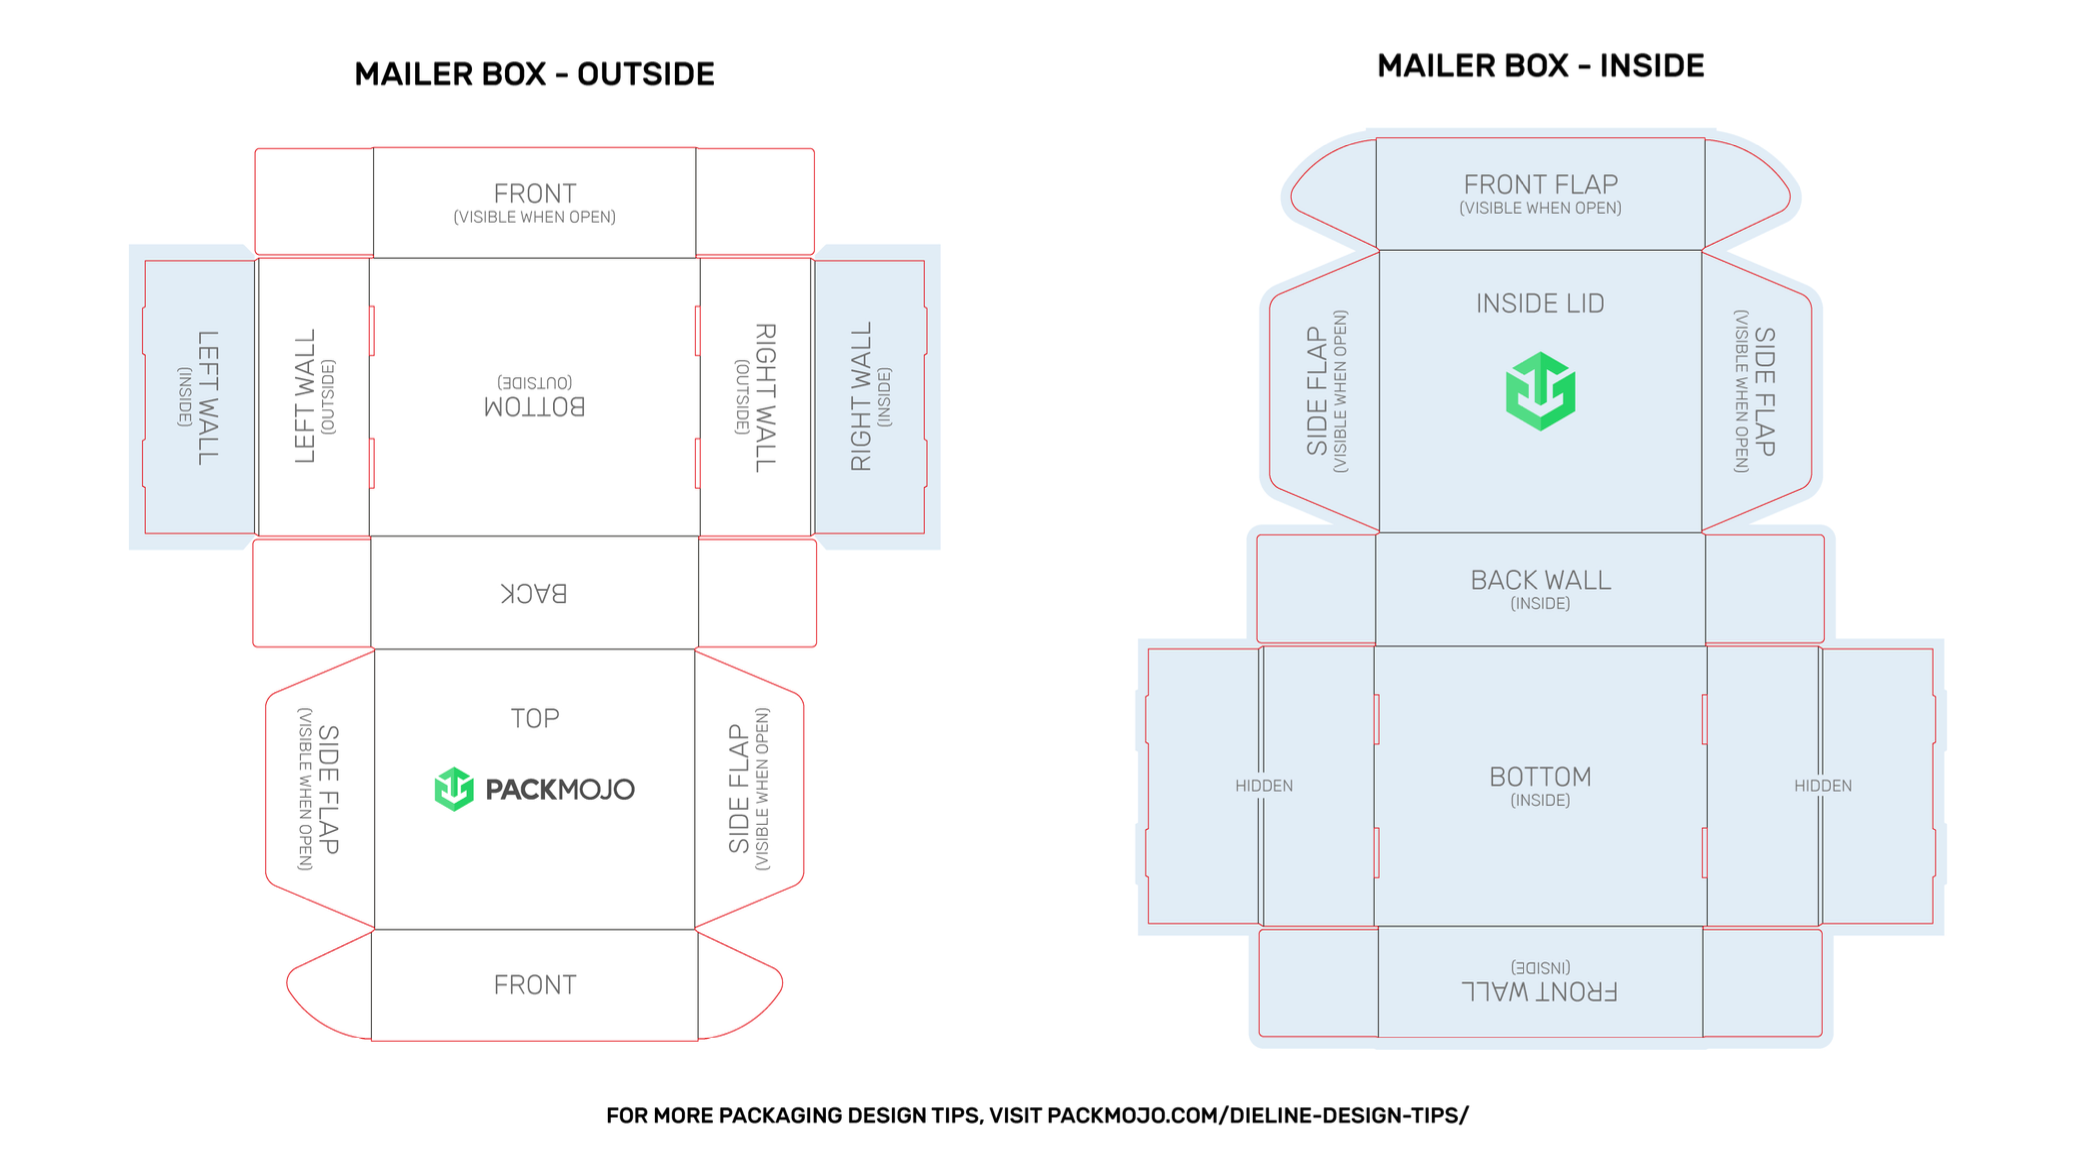
When designing make sure to reference the Mailer Box Orientation Guide to ensure that you are placing elements in the correct location and orientation.
The dielines that we provide should have 2 layers once you open the file: Dieline and Artwork. When adding artwork, make sure you’re adding it to your artwork layer to ensure it is printed on your box. If you do not see the separate layers, it is best practice to create a separate layer for your artwork.
Tip: Ensure that the artwork layer is under the dieline layer so that you can see the dieline during your entire design process. To do this, drag and drop your artwork layer to go underneath your dieline layer.
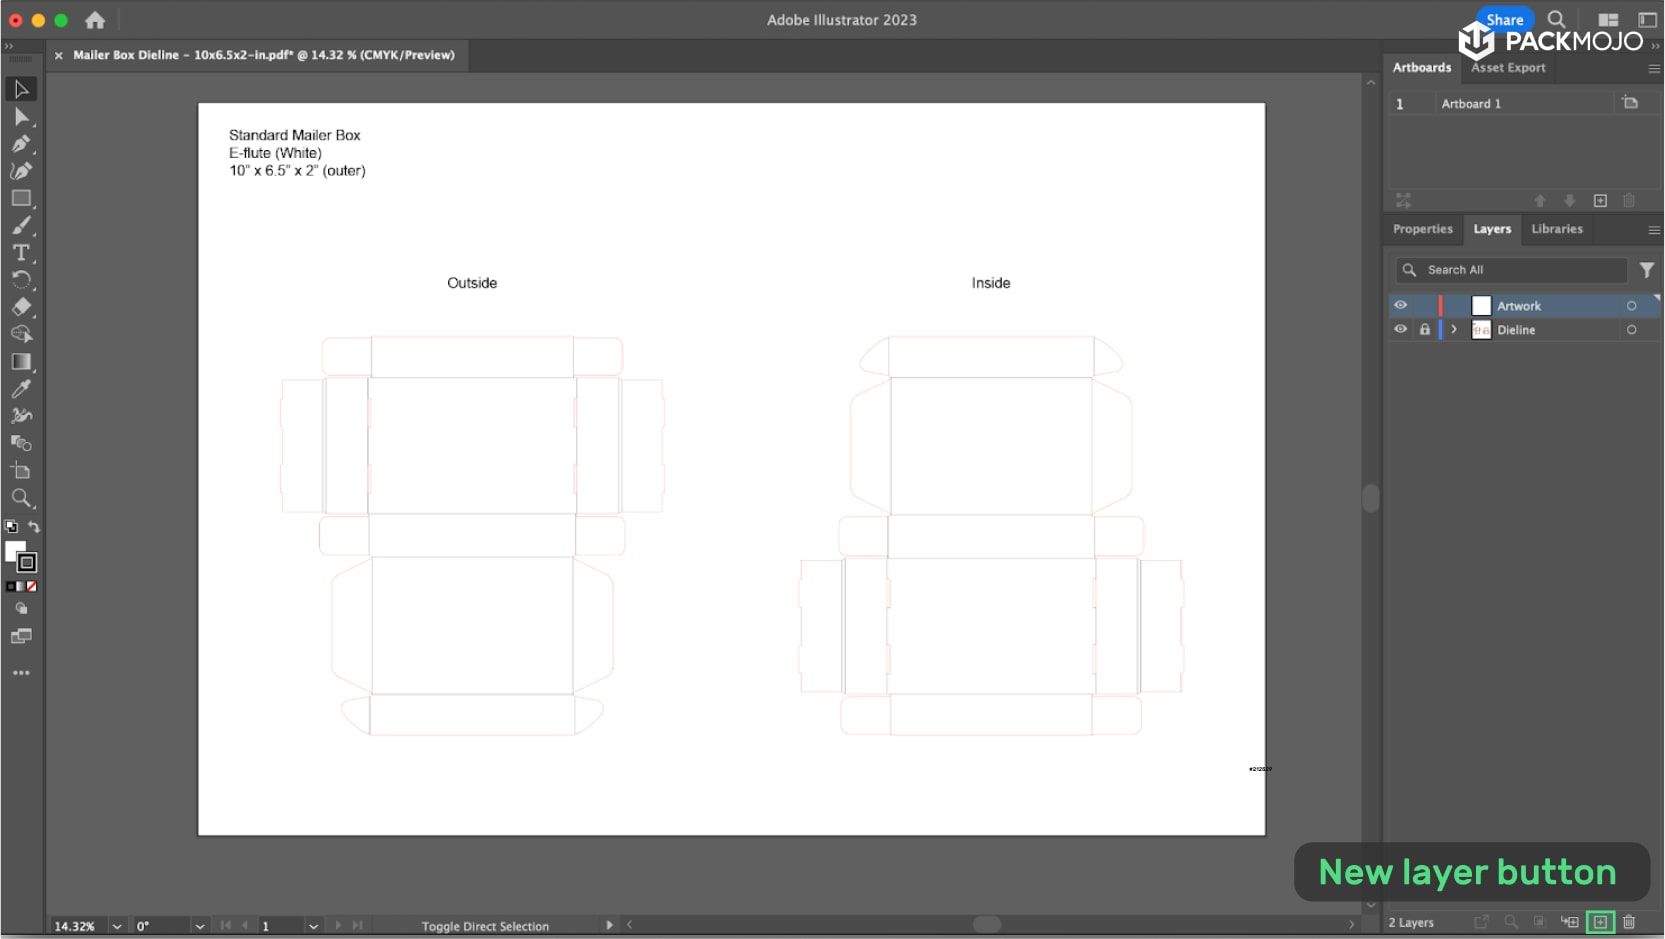
How to: Create a separate layer for your artwork
The dieline is a guide for where cut lines and fold lines are for your box. As they will not be printed directly on the box, you will need to create a separate layer to design your artwork on. Open the layers window found on the right toolbar (you go to Window > Layers), and click on the add new layer button on the bottom.
Tip: You can rename the layers “Dieline” and “Artwork” by double-clicking on the layer names.
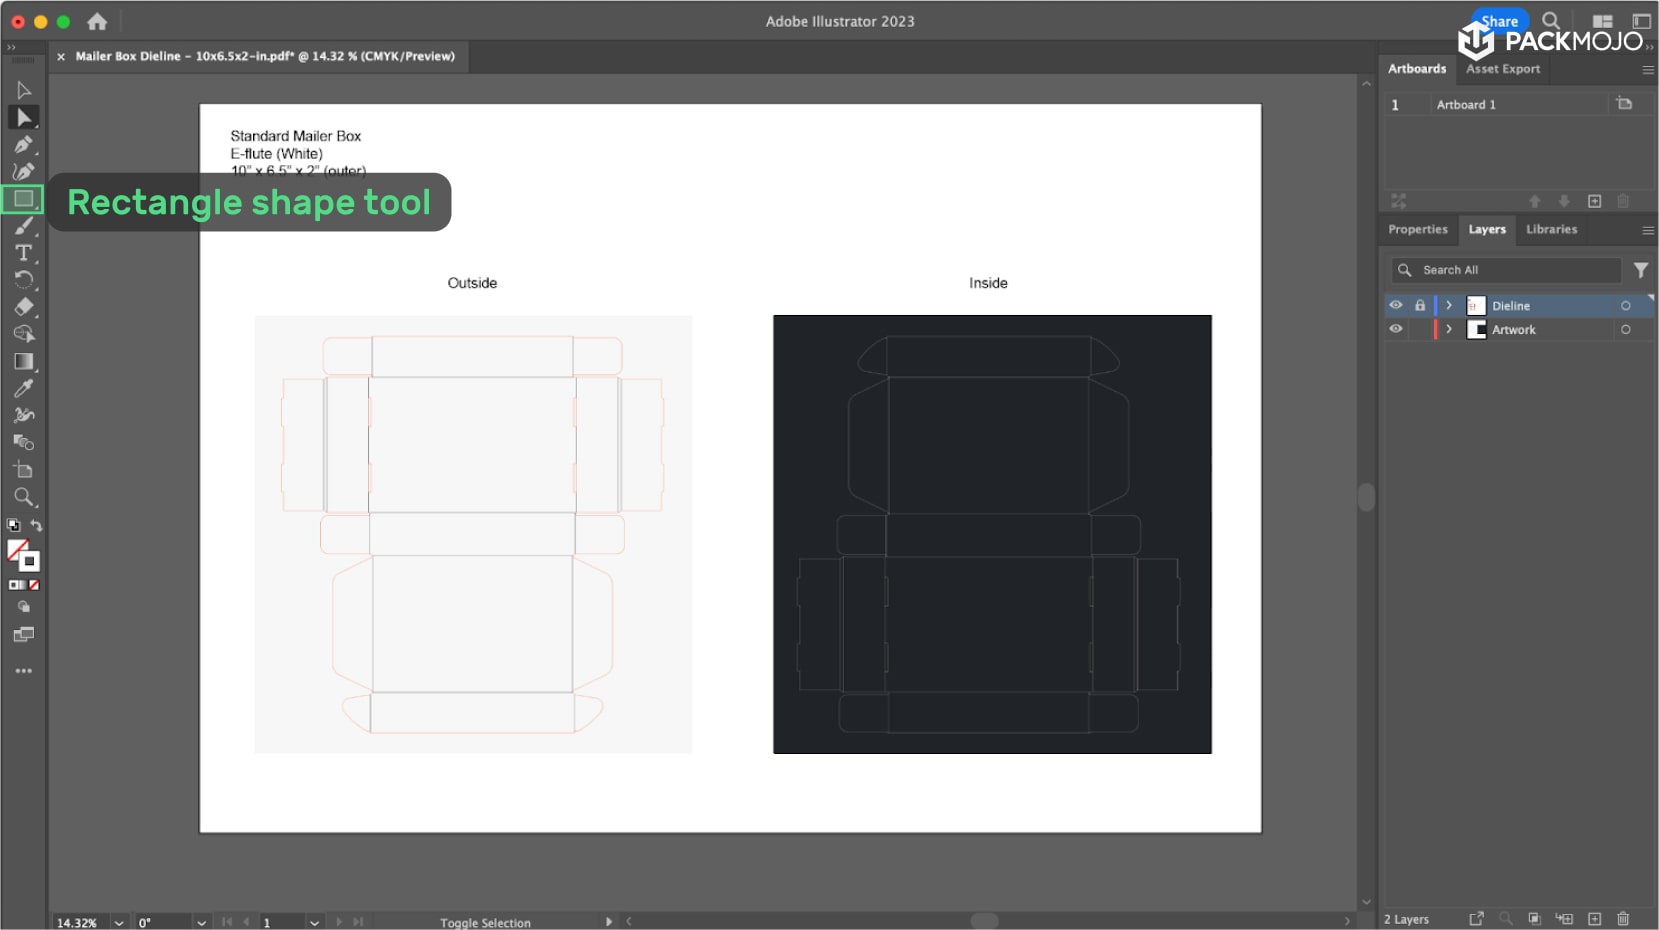
Guidelines for adding design elements to your packaging dieline
a. Background color
To add a background color for your box, start by going to the rectangle shape tool in your left toolbar and drag a rectangle that covers your dieline. Creating a shape that matches the dieline is also okay but unnecessary. The key is to ensure that the color goes beyond the dieline to account for bleeds during the print process.
Tip: If you are using a dark-colored background, feel free to change the color of the dieline to a lighter color so that you’re still able to see the lines.
b. Adding logos (SVG files)
Drag logos and images onto your dieline as you wish. When adding logos or graphics to your design, use the SVG file format for the best results. Assets in SVG format will maintain high quality and resolution, even when the elements are scaled or reproduced at different sizes. Be sure you have access to the original SVG source files, as those will be the optimal files to work with when placing these assets on the dieline.
Centering Logos:
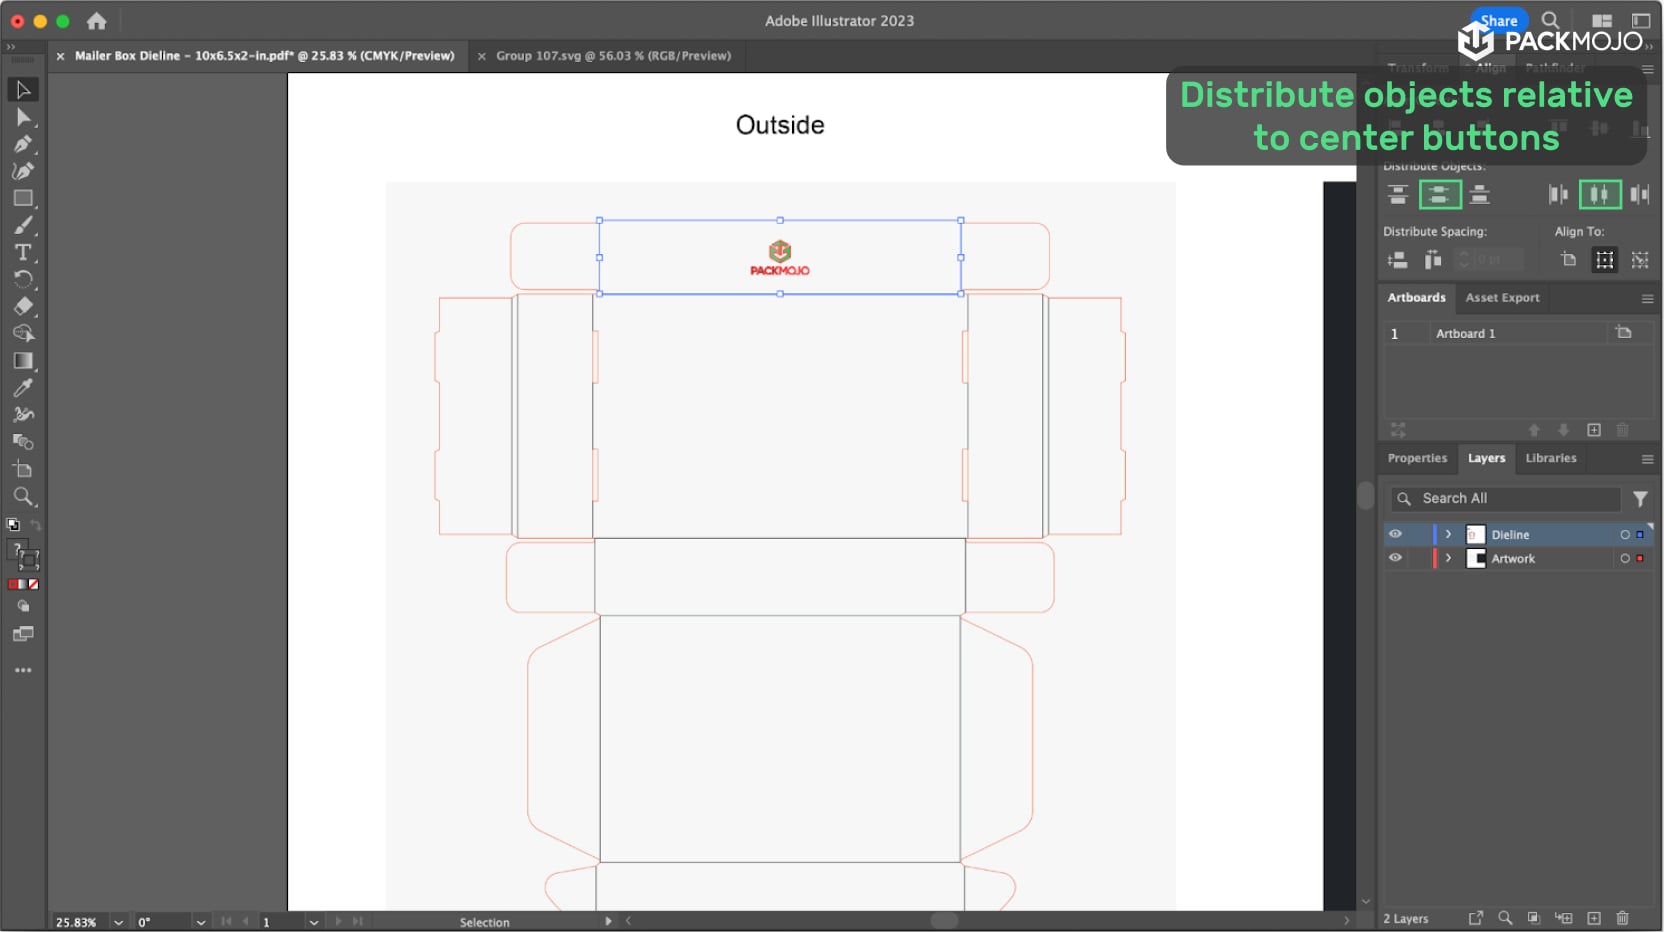
To center your logo or image, select the dieline lines that are directly above and below your image. Then open the align window (Window > Align) and distribute the objects by clicking the two 'Distribute objects to center' buttons.
c. Adding text
Add text to your design by clicking on the text tool in the left toolbar. Once you've typed your text, you should be able to change its properties (font, size, spacing) in the properties window on the right side toolbar (Window > Properties). Text can be centered on specific design panels by referring to the Centering Logos steps under b. Adding Logos.
Vectorizing text:
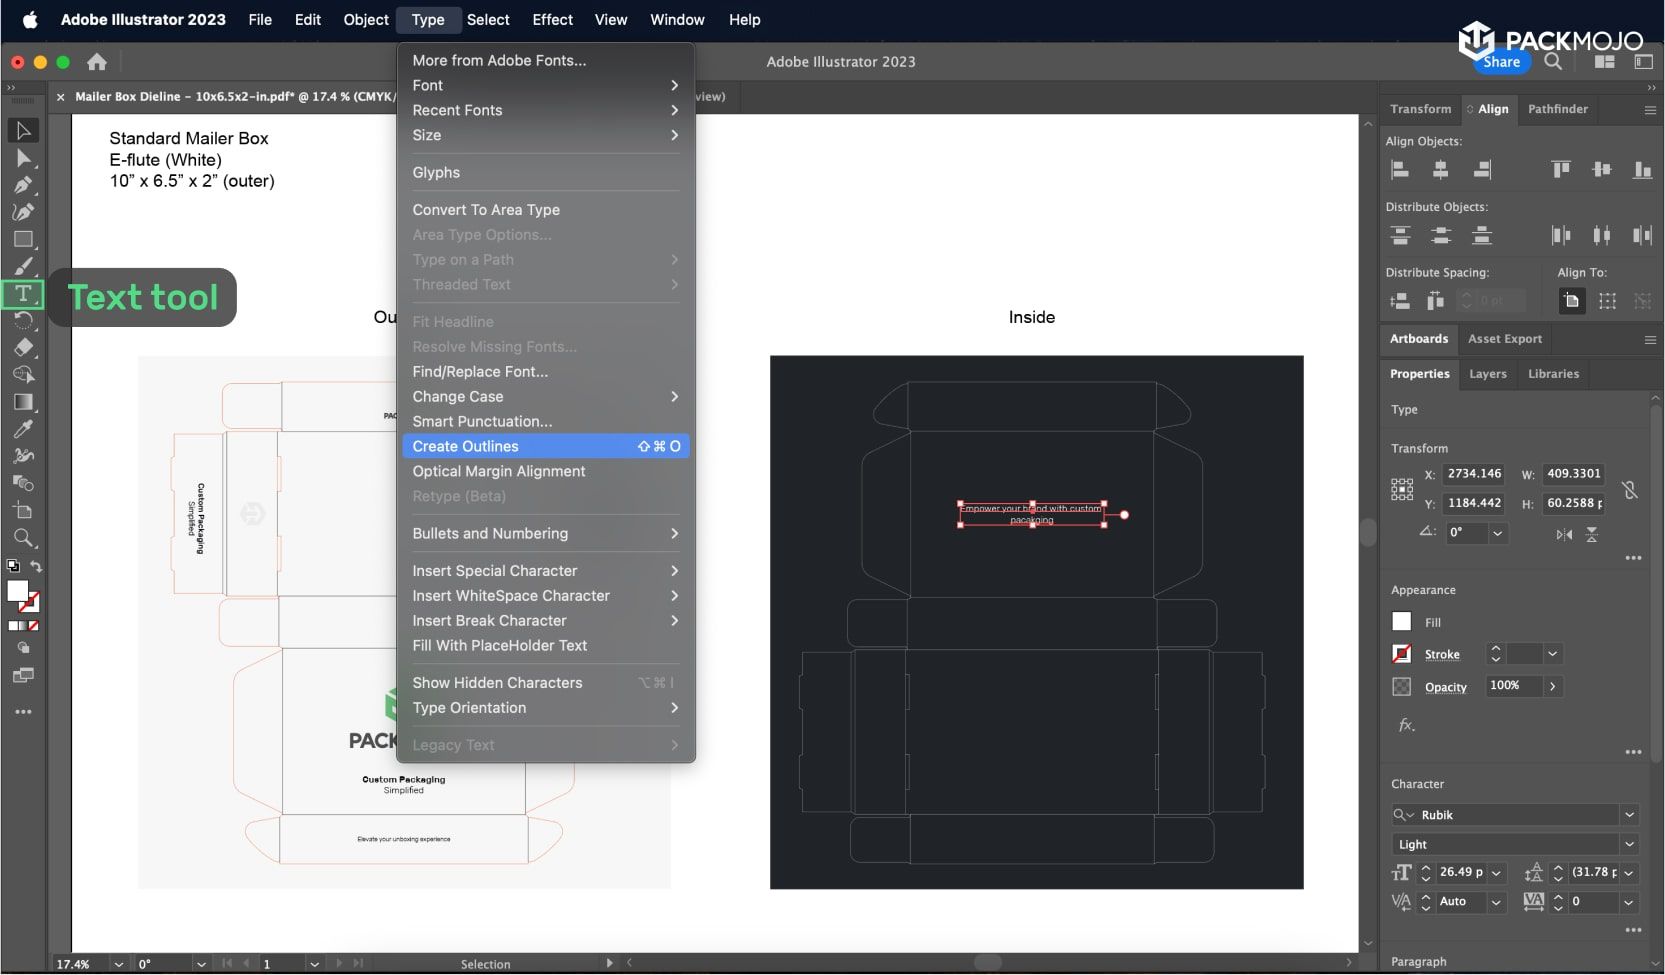
To avoid any missing font files during the printing process, you will need to vectorize your text once you’re happy with it. Vectorize your text by selecting all the text in your design and going to Type > Create Outlines. After this process you will no longer be able to change the text, so feel free to do this at the end of the design process.
Tip: Before vectorizing your text, make a copy of your illustrator file such that you have an "Editable" version of your design and an "Outlined" version of your design. This way, if you would like to make any modifications to your text in the future, you can come back to the "Editable" version file.
d. Images or logos in png/jpg/jpeg
If you are adding image files or logos in png/jpg/jpeg format to your design, we recommend for them to be at least 300 PPI (pixels per inch) for good quality output. You can check the PPI of your images by opening the Links window (Window > Links), clicking on the image file, and looking at the PPI in the provided information.
You will also have to make sure to provide us with the image files to avoid any missing files during the print process. You can do this by either embedding the files or sending us all linked assets.
Tip: If you’re looking to center your images, refer to Centering Logos under b. Adding logos.
Option A: Embedding image files
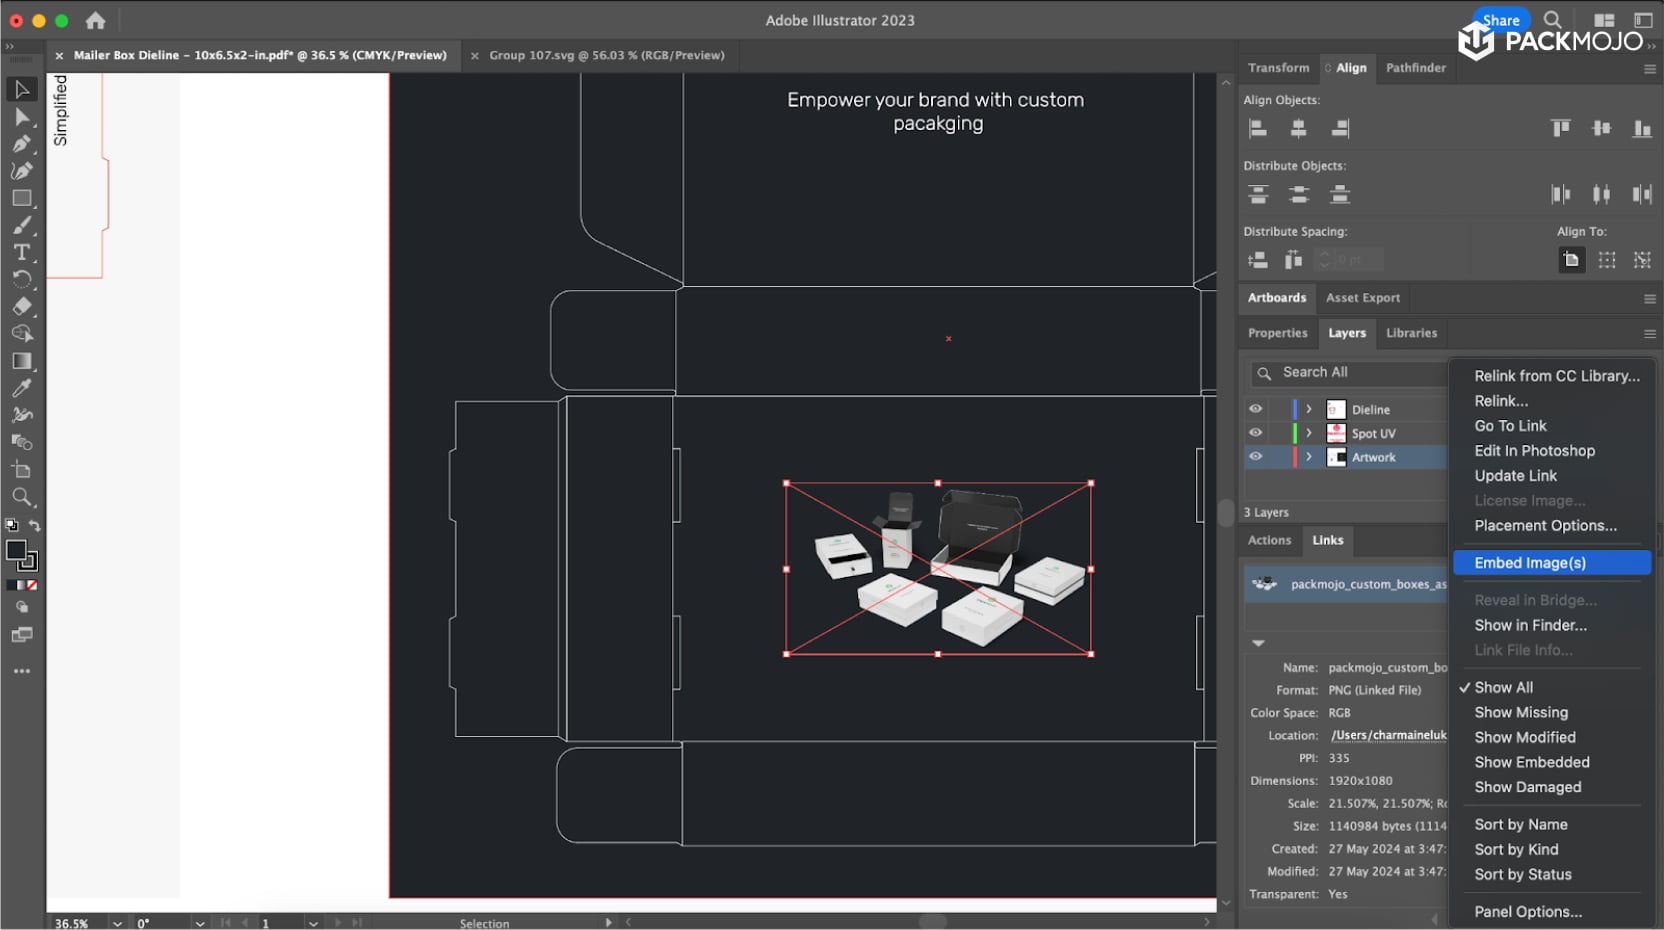
Embedding the image files allows you (and us) to only deal with one file. However, it will also increase the file size. To embed any image files in your design, first begin by opening the Links window (Window > Links). Click on all image files and select the menu button on the top right of the Links window. From there, select 'Embed Image(s)'.
Option B: Sending linked files
Sending linked files will keep your Illustrator file size down, ensuring Illustrator loads quickly. However, you will have to ensure that you are sending us the exact file to avoid any issues or delays during printing.
e. Adding enhancements
If you plan to have any enhancements such as spot UV, foil stamping, embossing, or debossing applied to your design, you will have to indicate them on a separate layer in the file.
Tip: If you do not see a layer for your enhancement, you can create one by clicking on the new layer button at the bottom of the layers window and renaming the layer for the enhancement that you will be doing.
Indicating enhancements in your design
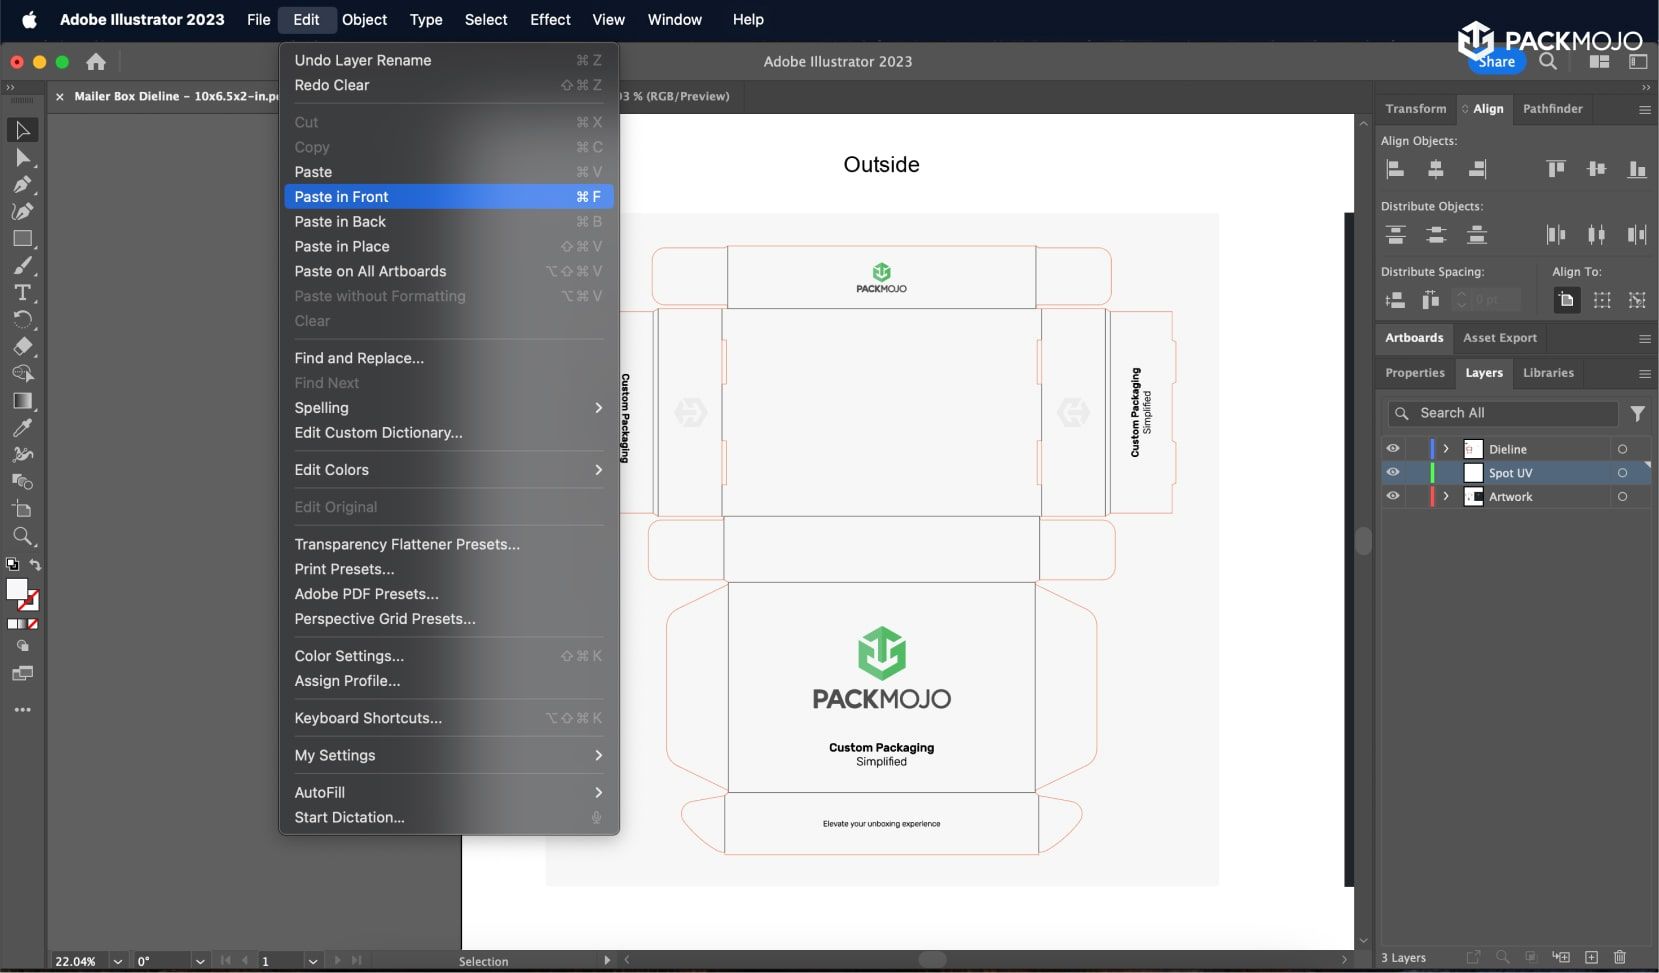
- Select the element you’d like to have this enhancement effect and copy the element.
- To paste the element in the exact same location, click on the original element and paste in front by going to Edit > Paste in Front
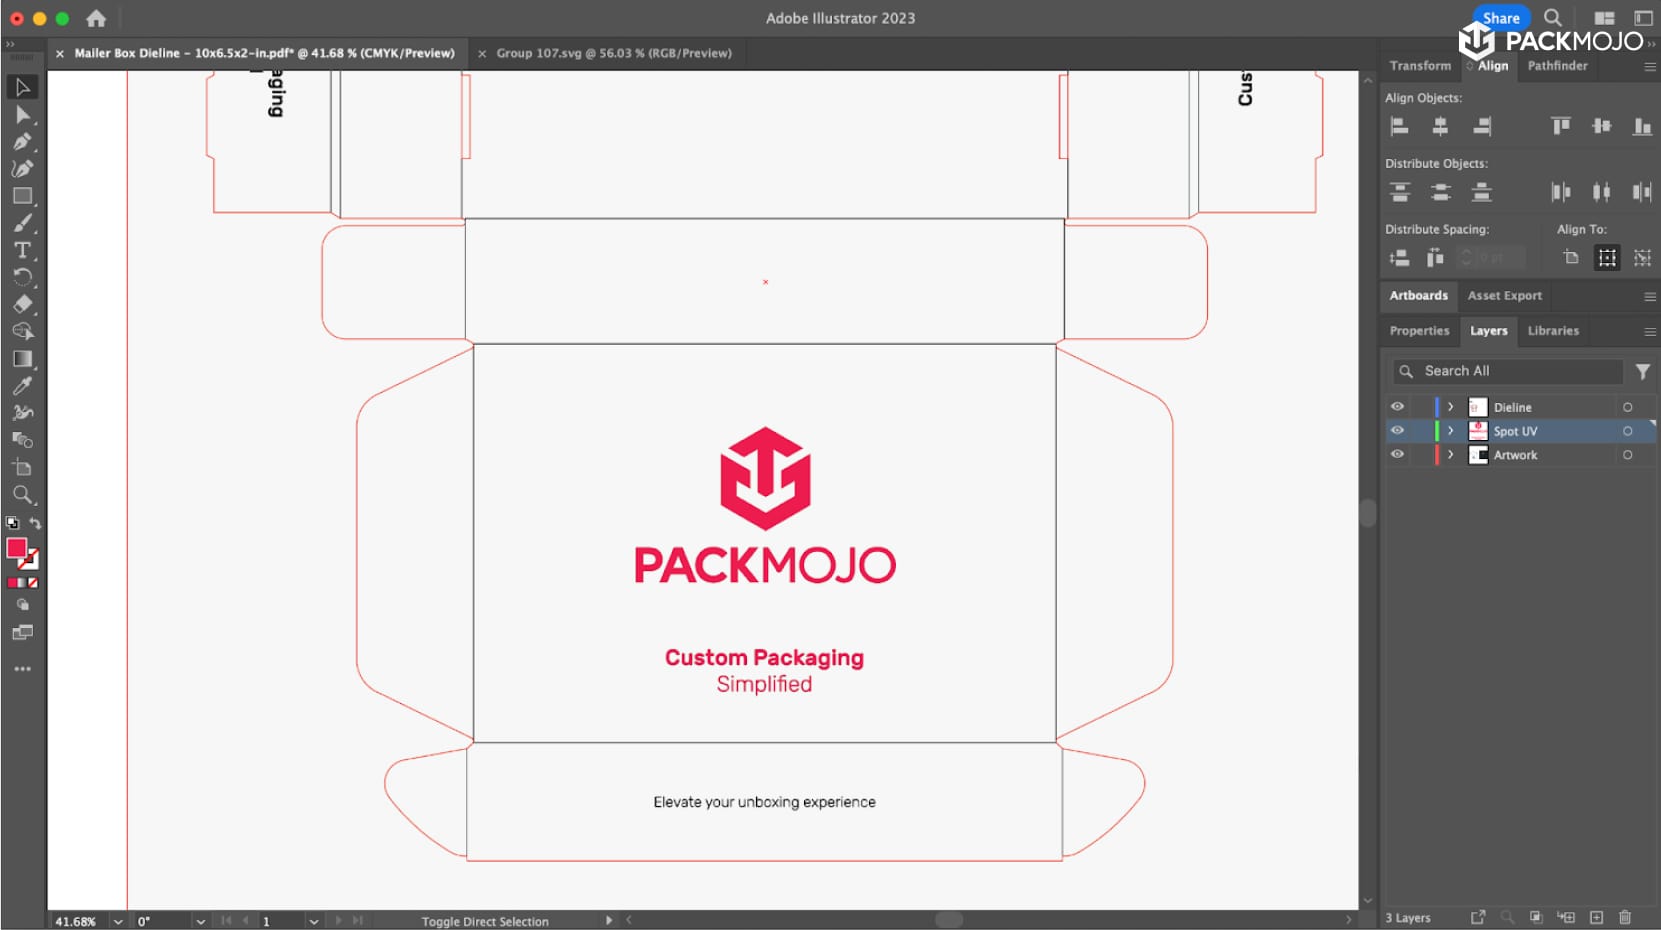
- After pasting, make sure to put it in the right layer by moving the item back into the layer created for this enhancement.
- Finally, select all elements in this layer and change their color (on the left toolbar) to one solid color such that it is clear that the areas under this color are to undergo enhancements.
